To help structure your datasets, you can use folders.
Folder view
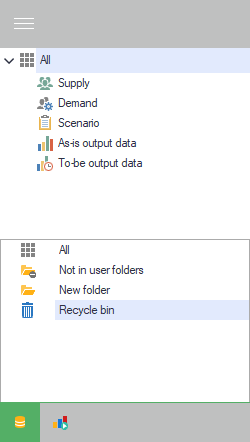
The folder view is located in the left bottom corner of the dataset view. It is possible that the folder view is hidden. In that case, press the three bars in the top left corner.
In the folder view you can see the available folders. Clicking on a folder filters the dataset list to only show datasets in that folder. If you want to see all datasets again, click the “All” option at the top of the folder view. If you want to only see datasets which are not in a folder, select the “Not in user folders” option.
Creating a folder
To create a folder, first select the folder in which you want to create the folder in the folder view. If you want to make a top-level folder, select the “All” option in the folder view. Then, select “New” in the “Folder” section of the ribbon, or right-click in the folder view and select “Create folder”. The new folder will appear in the folder view.
Renaming a folder
To rename a folder, simply select the folder in the folder view and press “Rename” in the “Folder” section of the ribbon, or right-click the folder and select “Rename folder”. After entering the new name, press Enter or click anywhere outside the folder to save the name. Press escape to discard your changes.
Moving datasets to a folder
To move a dataset to a folder, simply drag-and-drop it from the dataset list to the folder you want to move it to. To move a dataset out of the folders, drag-and-drop it to the “Not in user folders” option in the folder view.
Deleting a folder
To delete a folder, select the folder in the folder view and click “Delete” in the “Folder” section of the ribbon, or right-click the folder and select “Delete folder”. You will receive a confirmation dialog before really deleting the folder. Deleting a folder will not delete the datasets inside the folder, instead they will be automatically moved outside the folder.
Sharing a folder
Similarly to sharing datasets, folders can also be shared. Sharing a folder does not imply that all datasets within the folder are also shared. However, when you share a dataset which is in a folder with another user, that user will not be able to see that it is in the folder, and the dataset will just appear as if it was not in a folder. If you also share the folder with that user, the user can also see the folder and the dataset will be shown in that folder.
To share a folder, select the folder in the folder view and click “Share” in the “Folder” section of the ribbon, or right-click the folder and select “Share folder”. A share settings dialog similar to the dataset share settings appears. For more information on how to use the share settings, please refer to the page on sharing datasets.

Recycle bin
The recycle bin is a special folder, where you can find all datasets that you deleted.
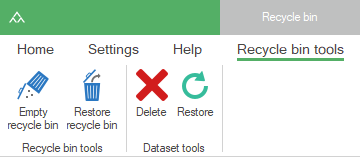
When selecting the recycle bin folder, the following actions are possible:
- Empty recycle bin. You can permanently delete all datasets in the recycle bin. When doing this, you will get a warning message. Only after a confirmation, this action can be completed.
- Restore recycle bin. When clicking this button, the entire content of the recycle bin will be restored, all datasets in it will be moved back to the datasets list and the bin will be emptied.
- Delete dataset. Click this button in order to permanently delete the current selected dataset in the recycle bin. A warning message will be shown. Only after confirmation, the dataset will be deleted and cannot be longer retrieved.
- Restore dataset. This functionality allow you to move a dataset back to the datasets list.
All actions mentioned above are available in the ribbon but also in the context menu by right-clicking on the recycle folder or on a dataset.